DIY Kids Room Customization Ideas: Creative Guide
Designing a child’s room can be one of the most enjoyable home projects. It’s a space where imagination grows, creativity thrives, and comfort matters just as much as fun. The good news is you don’t need complicated tools or advanced skills to make it special. With a few thoughtful ideas, you can transform any kids’ room into a personalized and inspiring space.
This guide explores simple, creative, and practical ways to customize a kids’ room using DIY ideas that are easy to follow and enjoyable to implement.
Why Customize a Kids’ Room?
A child’s room is more than just a place to sleep. It’s their personal world. Customizing it helps reflect their personality, interests, and evolving needs.
It also encourages independence and creativity. When kids feel connected to their space, they’re more likely to keep it organized and enjoy spending time there.
DIY customization allows flexibility. You can adjust designs as your child grows, without needing a complete makeover each time.
Make It Personal and Meaningful
Personal touches make a big difference. Instead of generic décor, include elements that reflect your child’s hobbies, favorite colors, or characters.
You can start small with:
- Name wall art or initials
- A display for drawings or crafts
- Personalized bedding or cushions
These details create a sense of belonging and ownership.
Keep It Functional and Flexible
While creativity is important, functionality should not be ignored. A well-designed kids’ room balances play, study, and rest.
Think about:
- Storage solutions for toys and books
- Comfortable study areas
- Open space for movement and play
Flexibility is key. Choose designs that can adapt as your child’s interests change.
Creative DIY Customization Ideas
There are countless ways to customize a kids’ room. The goal is to keep it simple, fun, and adaptable. Below are some practical ideas that work for different age groups and room sizes.
Wall Makeover Ideas
Walls offer the biggest opportunity for transformation. A simple update can completely change the look and feel of the room.
Try these ideas:
- Chalkboard Wall: Paint one section with chalkboard paint. Kids can draw, write, and express themselves freely.
- Wall Decals: Easy to apply and remove. Choose themes like space, animals, or nature.
- Gallery Wall: Frame your child’s artwork or photos for a personal touch.
You can also use stencils to create patterns without needing advanced painting skills.
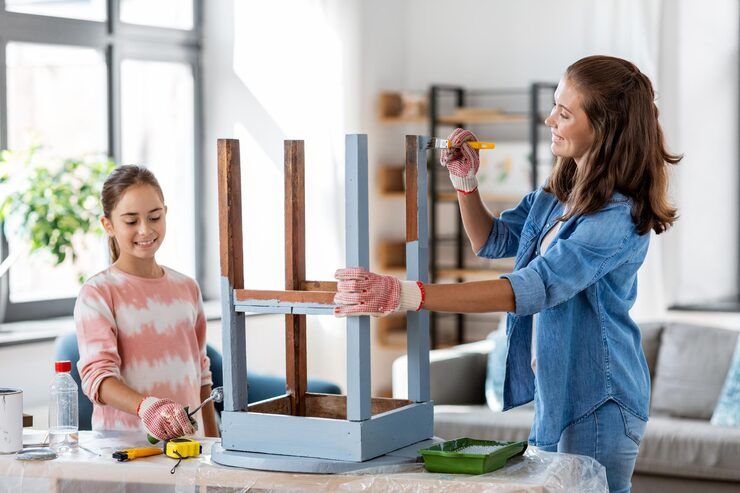
Furniture Upgrades
You don’t always need new furniture. A few tweaks can make old pieces feel fresh and exciting.
Ideas include:
- Repainting a study table in bright colors
- Adding themed knobs to drawers
- Using stickers or decals on wardrobes
These changes are simple but impactful.
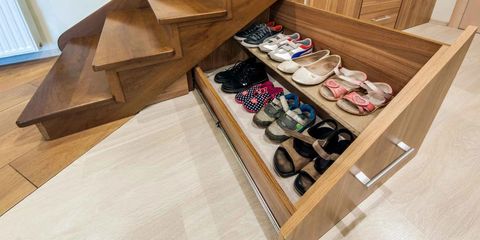
Creative Storage Solutions
Storage doesn’t have to be boring. With a little creativity, it can become part of the décor.
Consider:
- Colorful bins or baskets
- Hanging organizers for toys
- DIY shelves shaped like clouds or houses
This keeps the room tidy while adding visual interest.
DIY Ideas Based on Age Group
Children’s needs change as they grow. Customizing the room according to their age helps keep it relevant and functional.
For Toddlers (2–5 Years)
Focus on safety and playful elements. Use soft colors and simple designs.
Key ideas:
- Low shelves for easy access
- Soft rugs for safe play
- Bright, cheerful wall themes
Avoid sharp edges and keep everything within reach.
For School-Age Kids (6–12 Years)
This is the stage where learning and hobbies become important.
Include:
- A dedicated study corner
- Display boards for achievements
- Hobby zones for art or crafts
Let them participate in design decisions. It builds confidence and creativity.
For Teens (13+ Years)
Teenagers prefer more independence in their space. Their room should reflect their personality.
Ideas include:
- Minimalist or themed décor
- Mood lighting with LED strips
- Customized wall posters or quotes
Keep the design flexible so it can evolve with their preferences.
Materials and Tools Overview
Before starting any DIY project, it helps to know what you might need. Most projects use basic, easily available materials.
Here’s a simple reference table:
| DIY Project Type | Common Materials Needed | Difficulty Level |
|---|---|---|
| Wall Painting | Paint, brushes, stencils | Easy |
| Furniture Makeover | Sandpaper, paint, stickers | Medium |
| Storage Solutions | Baskets, wood boards, hooks | Easy |
| Wall Art & Décor | Frames, paper, glue, prints | Easy |
| Lighting Enhancements | LED strips, clips, wires | Medium |
Start with easier projects if you’re new to DIY. As you gain confidence, you can try more detailed customizations.
Budget-Friendly DIY Tips
Customizing a kids’ room doesn’t require expensive materials. Many creative solutions use items you already have at home.
Reuse and Repurpose
Old furniture can be refreshed with paint or new handles. Empty jars can become pencil holders. Wooden crates can turn into shelves.
Repurposing not only saves resources but also adds a unique touch to the room.
Keep Projects Simple
Avoid overly complex designs. Simple ideas are easier to manage and maintain.
Focus on:
- Clean layouts
- Practical designs
- Easy-to-update elements
This ensures long-term usability.
Involve Your Child
Let your child help with small tasks like choosing colors or arranging décor. It makes the process more enjoyable and meaningful.
It also encourages creativity and responsibility.
Safety Considerations
Safety should always come first, especially for younger children.
Keep these points in mind:
- Use non-toxic paints and materials
- Secure heavy furniture to the wall
- Avoid small detachable parts for younger kids
Also, ensure proper lighting and ventilation in the room.
Common Mistakes to Avoid
Even simple DIY projects can go wrong if not planned properly. Being aware of common mistakes helps you avoid them.
Overcrowding the Room
Too many decorations can make the room feel cluttered. Keep a balance between design and space.
Ignoring Storage Needs
A visually appealing room is not enough. Without proper storage, it can quickly become messy.
Choosing Temporary Trends
Kids’ interests change quickly. Avoid designs that are too specific or difficult to update.
Instead, use adaptable themes that can evolve over time.
Final Tips for a Successful DIY Room
A well-customized kids’ room doesn’t need to be perfect. It just needs to feel comfortable and personal.
Keep these final tips in mind:
- Start small and build gradually
- Focus on both design and functionality
- Choose elements that can grow with your child
- Keep maintenance easy and practical
Conclusion
Customizing a kids’ room with DIY ideas is a rewarding experience. It allows you to create a space that reflects your child’s personality while staying practical and adaptable.
You don’t need complicated tools or elaborate plans. Simple changes like wall art, furniture updates, and creative storage can make a big difference.
By focusing on creativity, functionality, and safety, you can design a room that your child will enjoy every day. Start with one idea, experiment, and let the space evolve naturally over time.